This article describes how to purchase an DriftWP subscription and create your WordPress site in a few clicks.
Step 1: Choose Your Plan
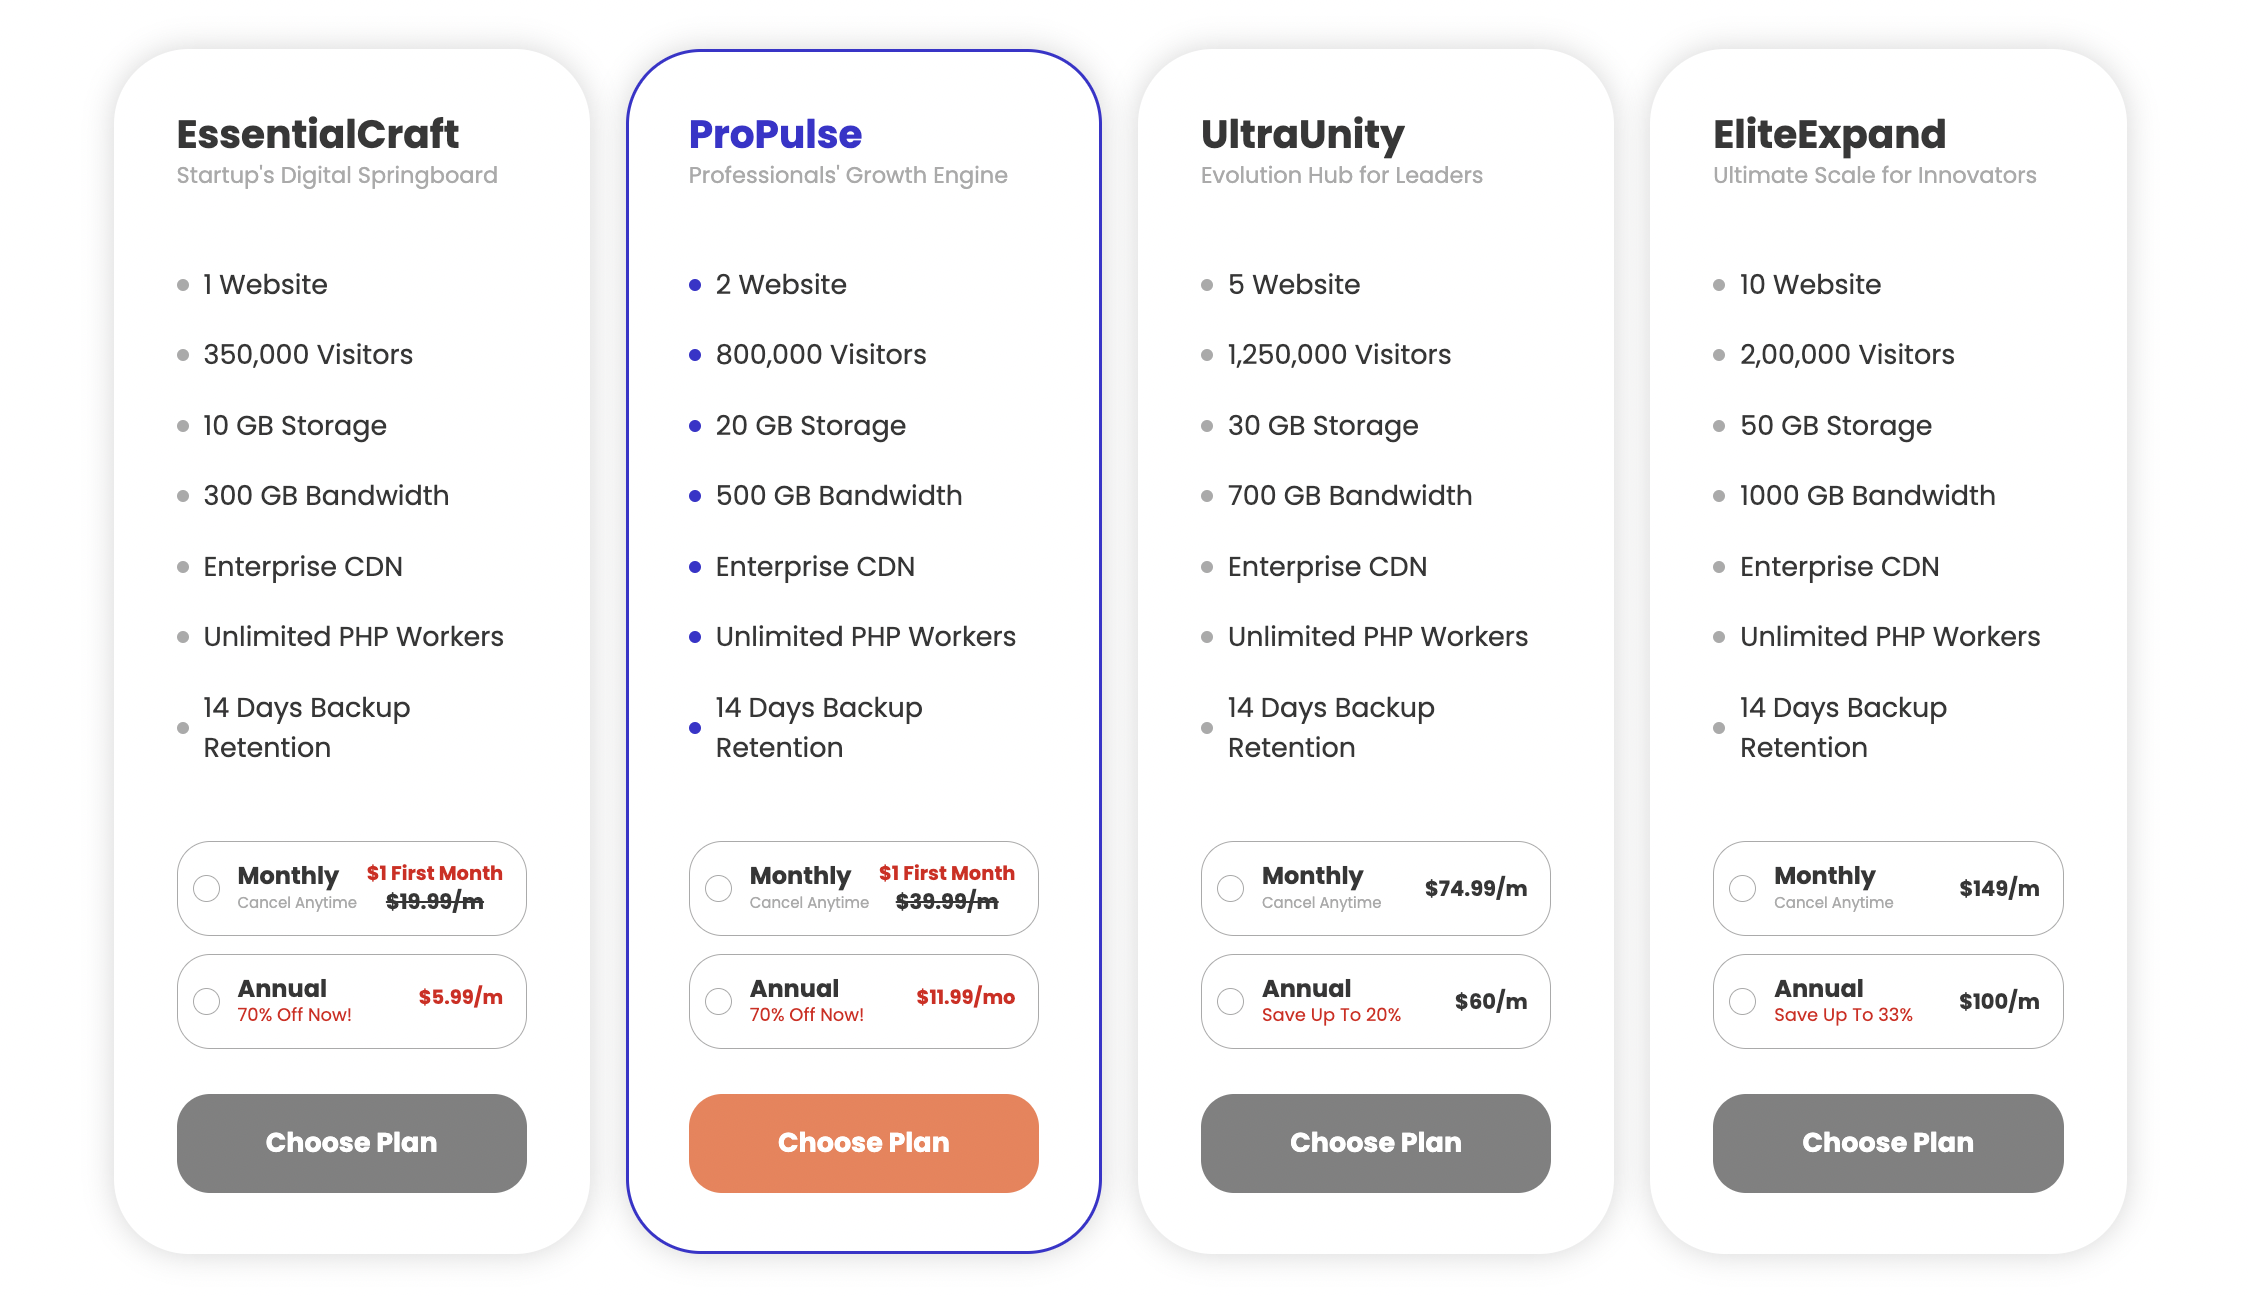
Select Your Plan & Billing Cycle: Browse through our variety of plans and select the one that fits your needs by clicking on Choose Plan. Unsure which plan suits you best? Don’t hesitate to Contact Us—our friendly team is here to assist you in making the perfect choice.
Step 2: Set Up Your Account
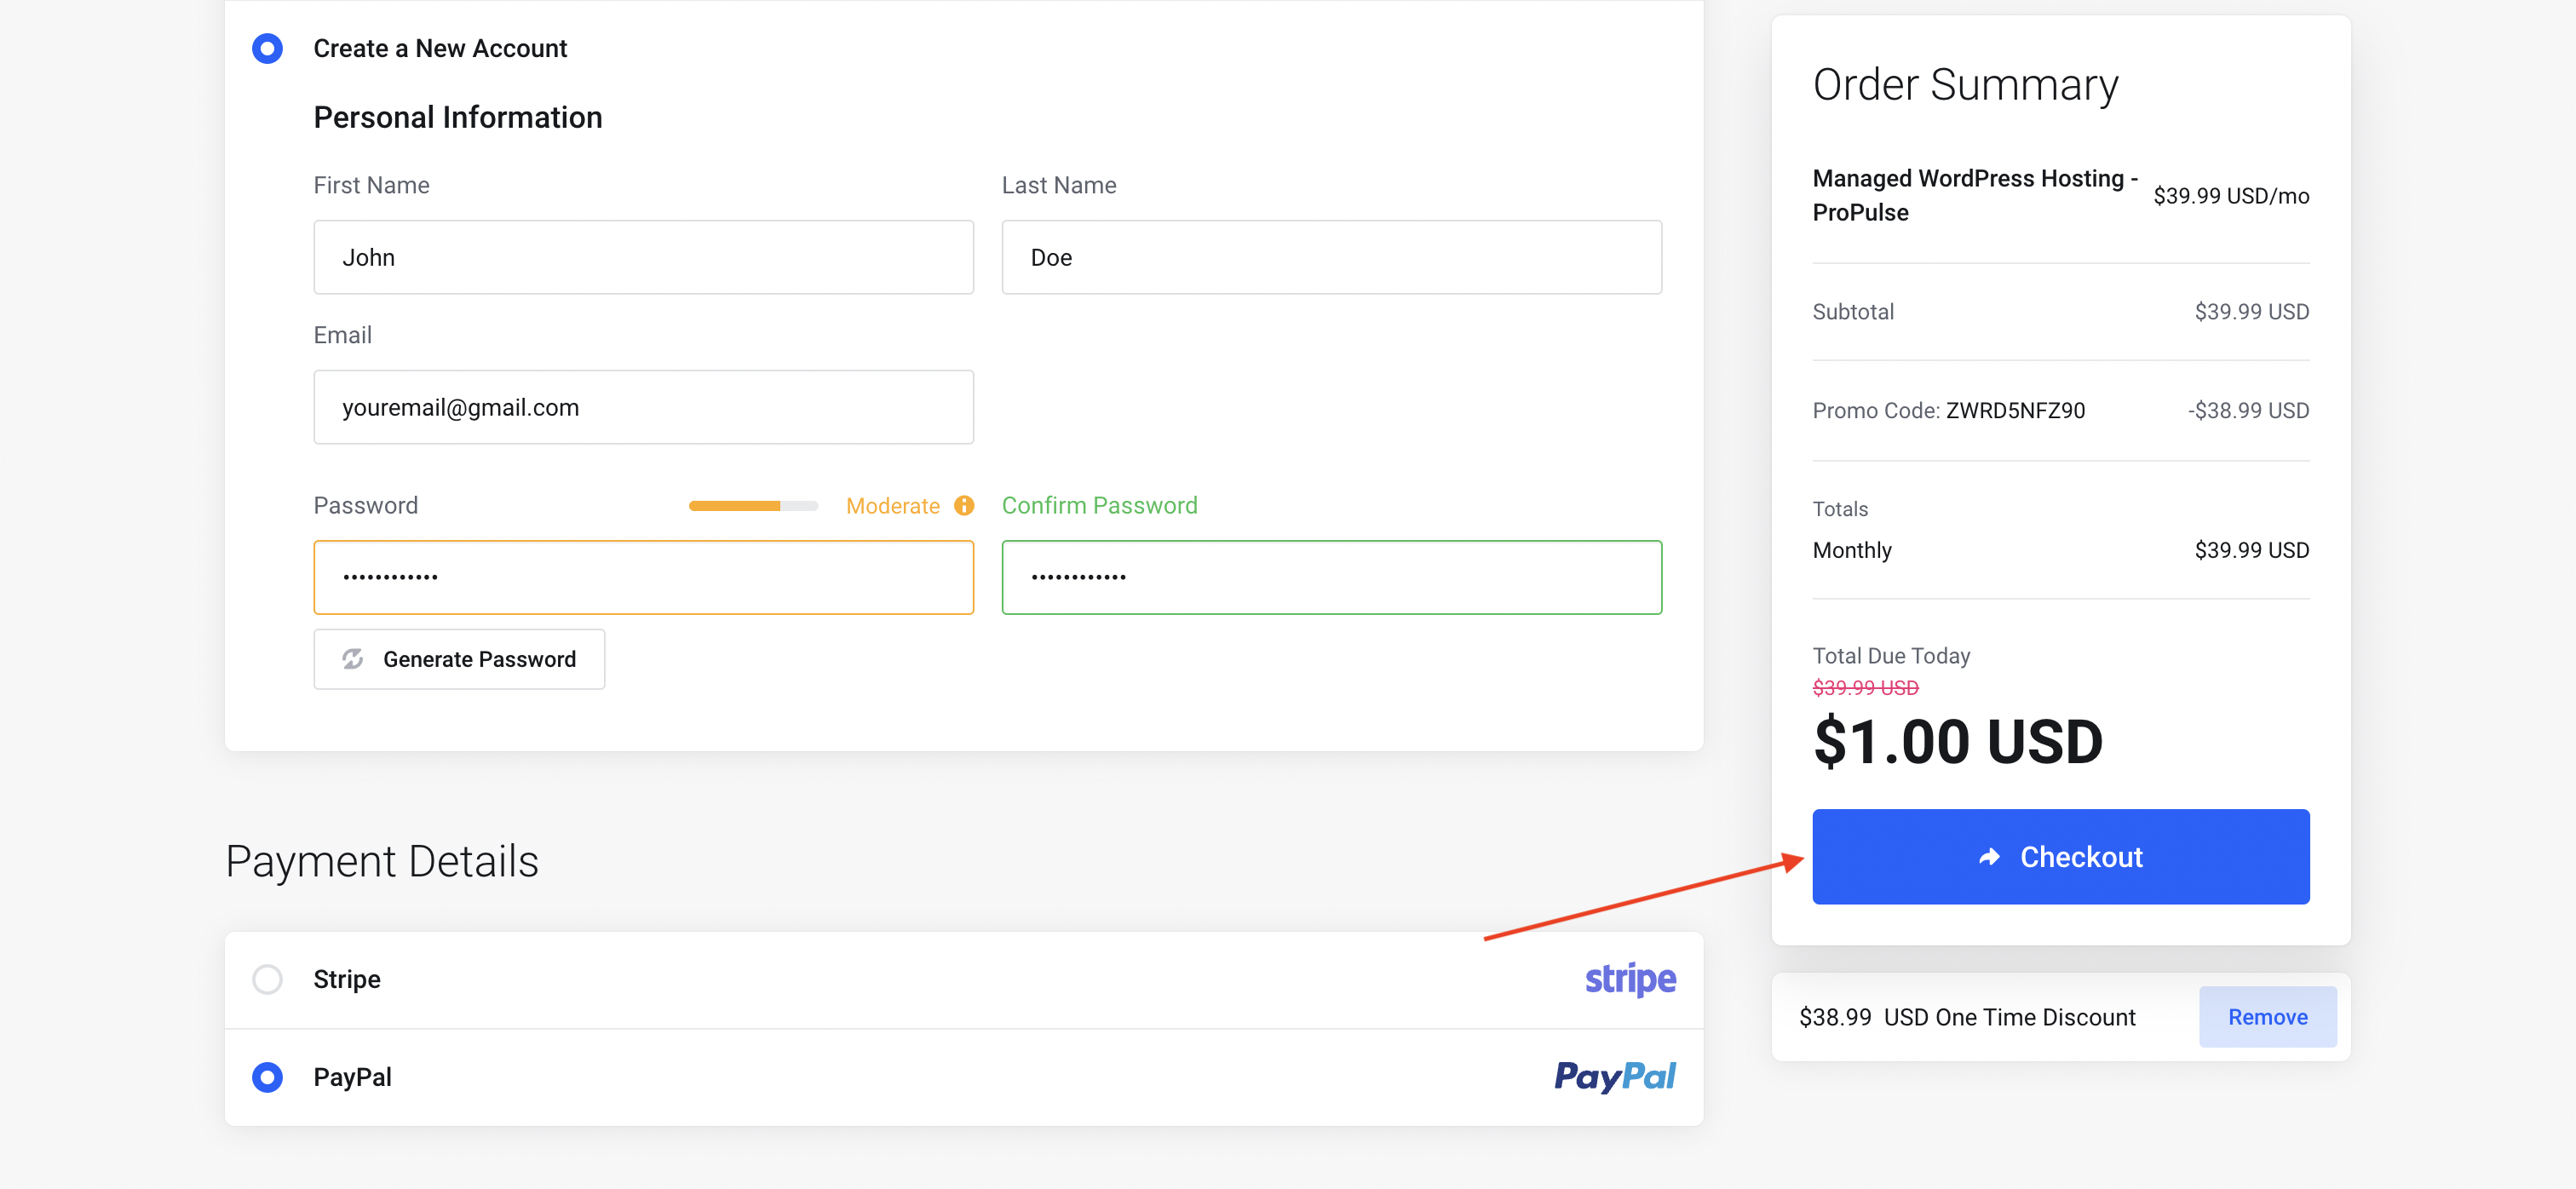
- Enter Your Personal Information: Please provide your first name, last name, and choose a secure password.
- Payment Details: Select your preferred payment method, enter your card details, and then click Checkout to proceed.
Step 3: Account Activation
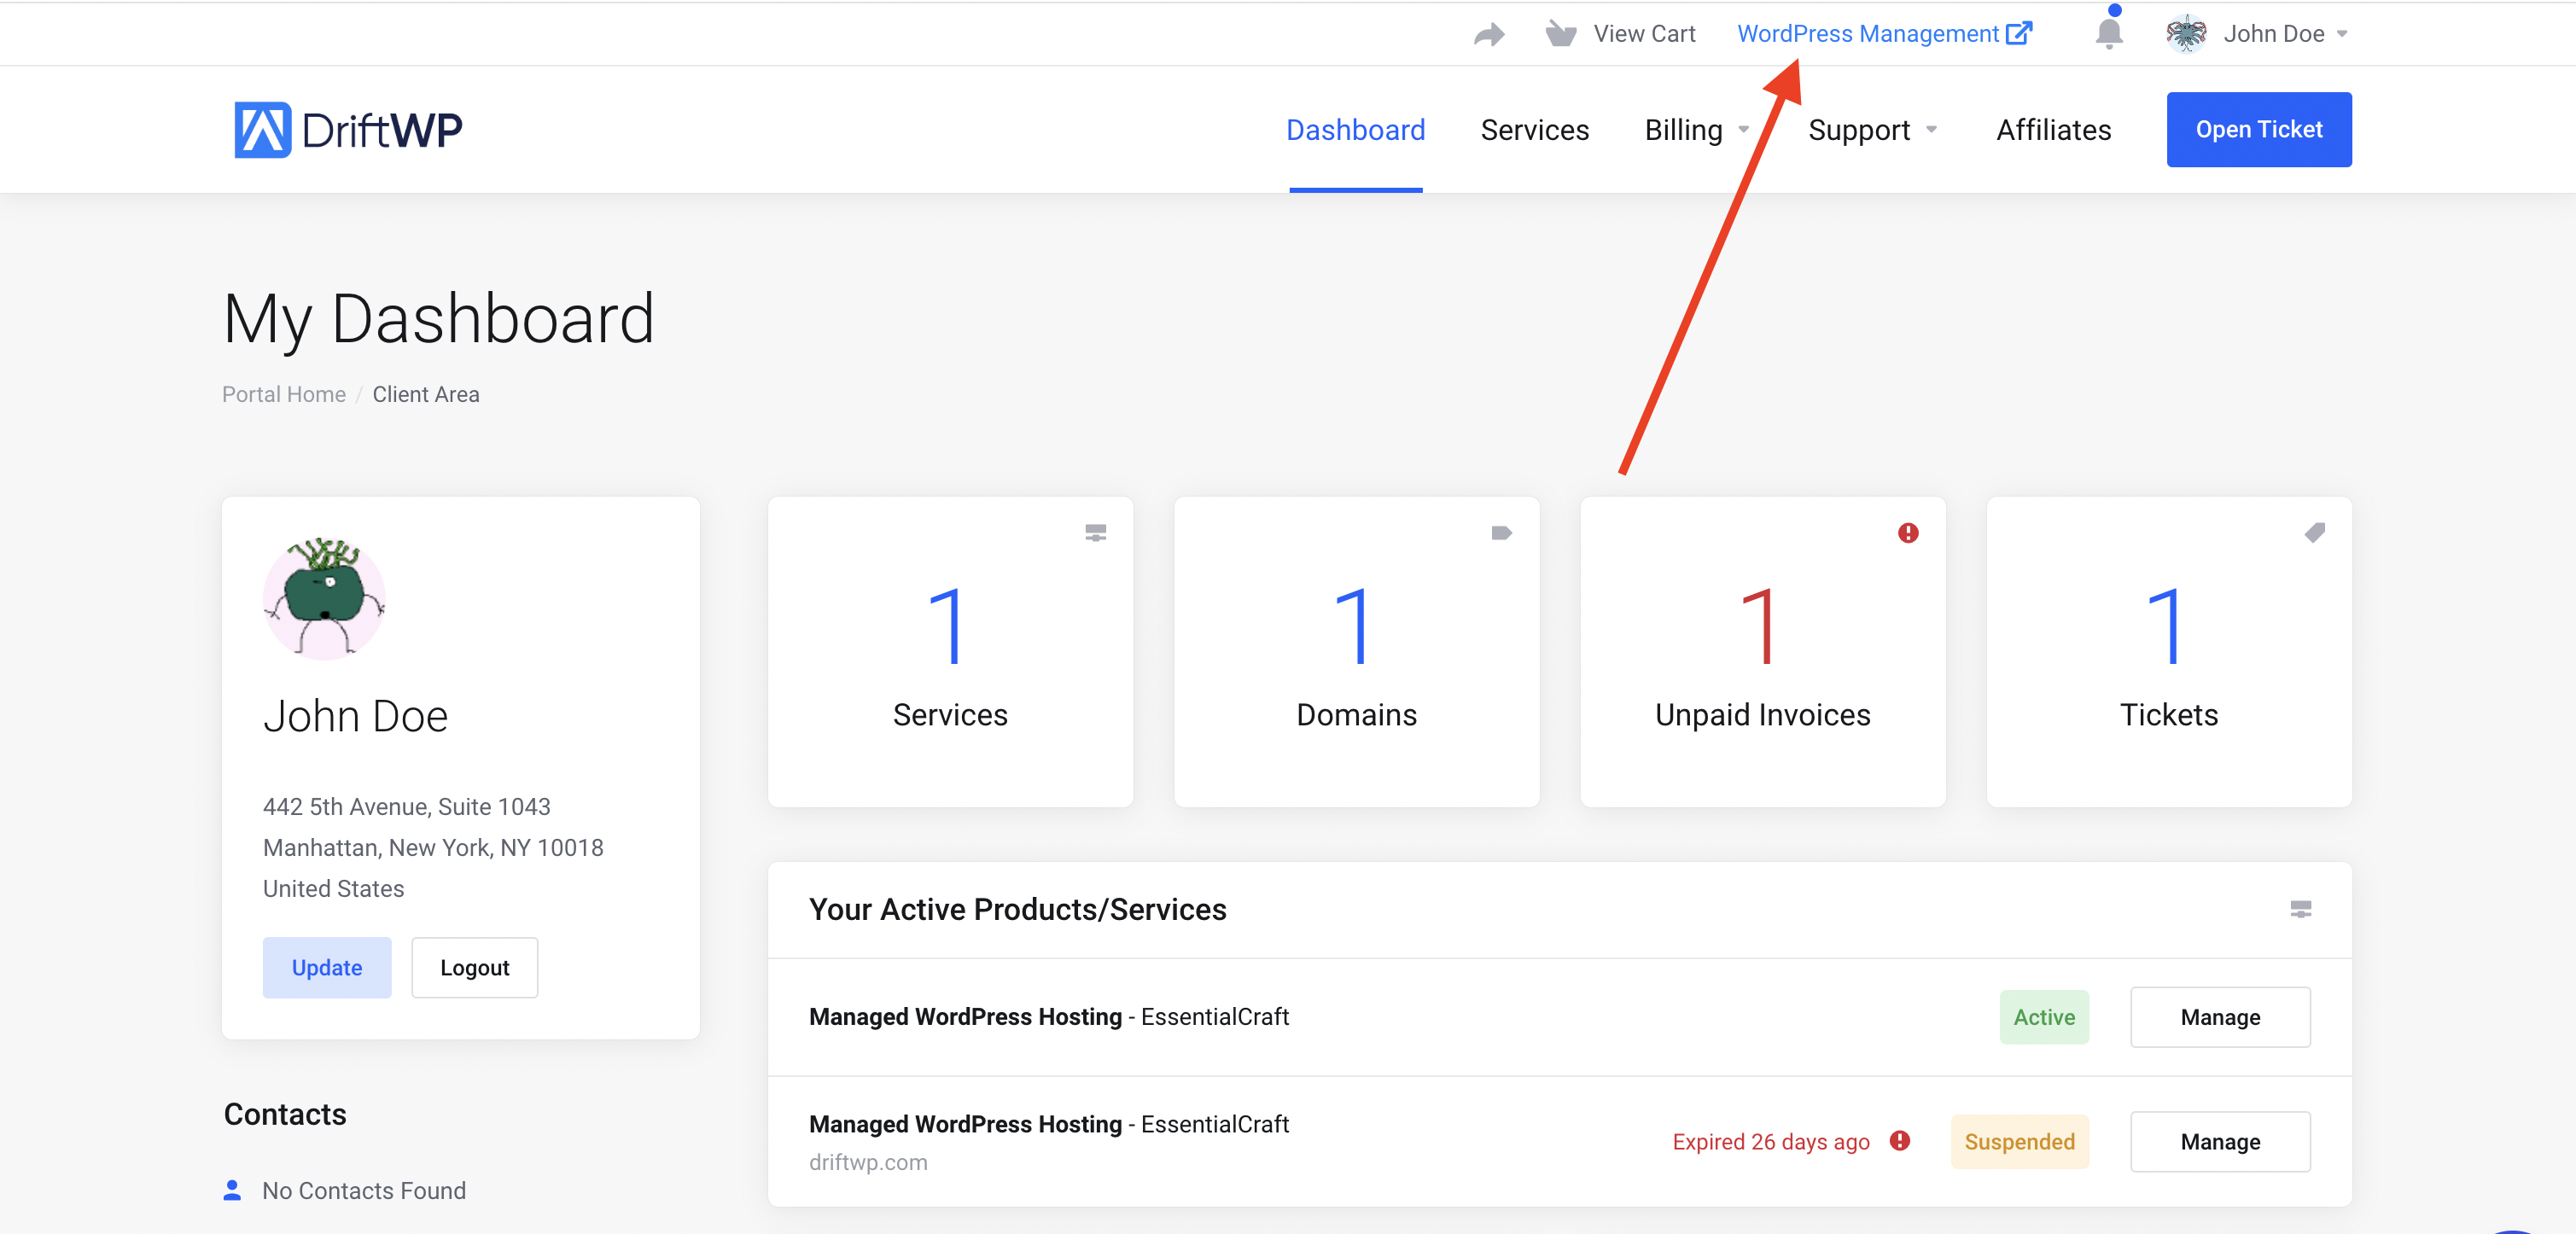
- Access the Main Page: Once your account setup is complete, you'll be directed to the main page. Please note, to start using our service, you must fill out all mandatory fields in your personal information (marked with an asterisk *).
Step 4: Enable WordPress Management
- Activate WordPress Management: After entering your personal details, you'll see the WordPress Management option on the portal. Clicking this will take you directly to the control panel.

Step 5: Create Your WordPress Website
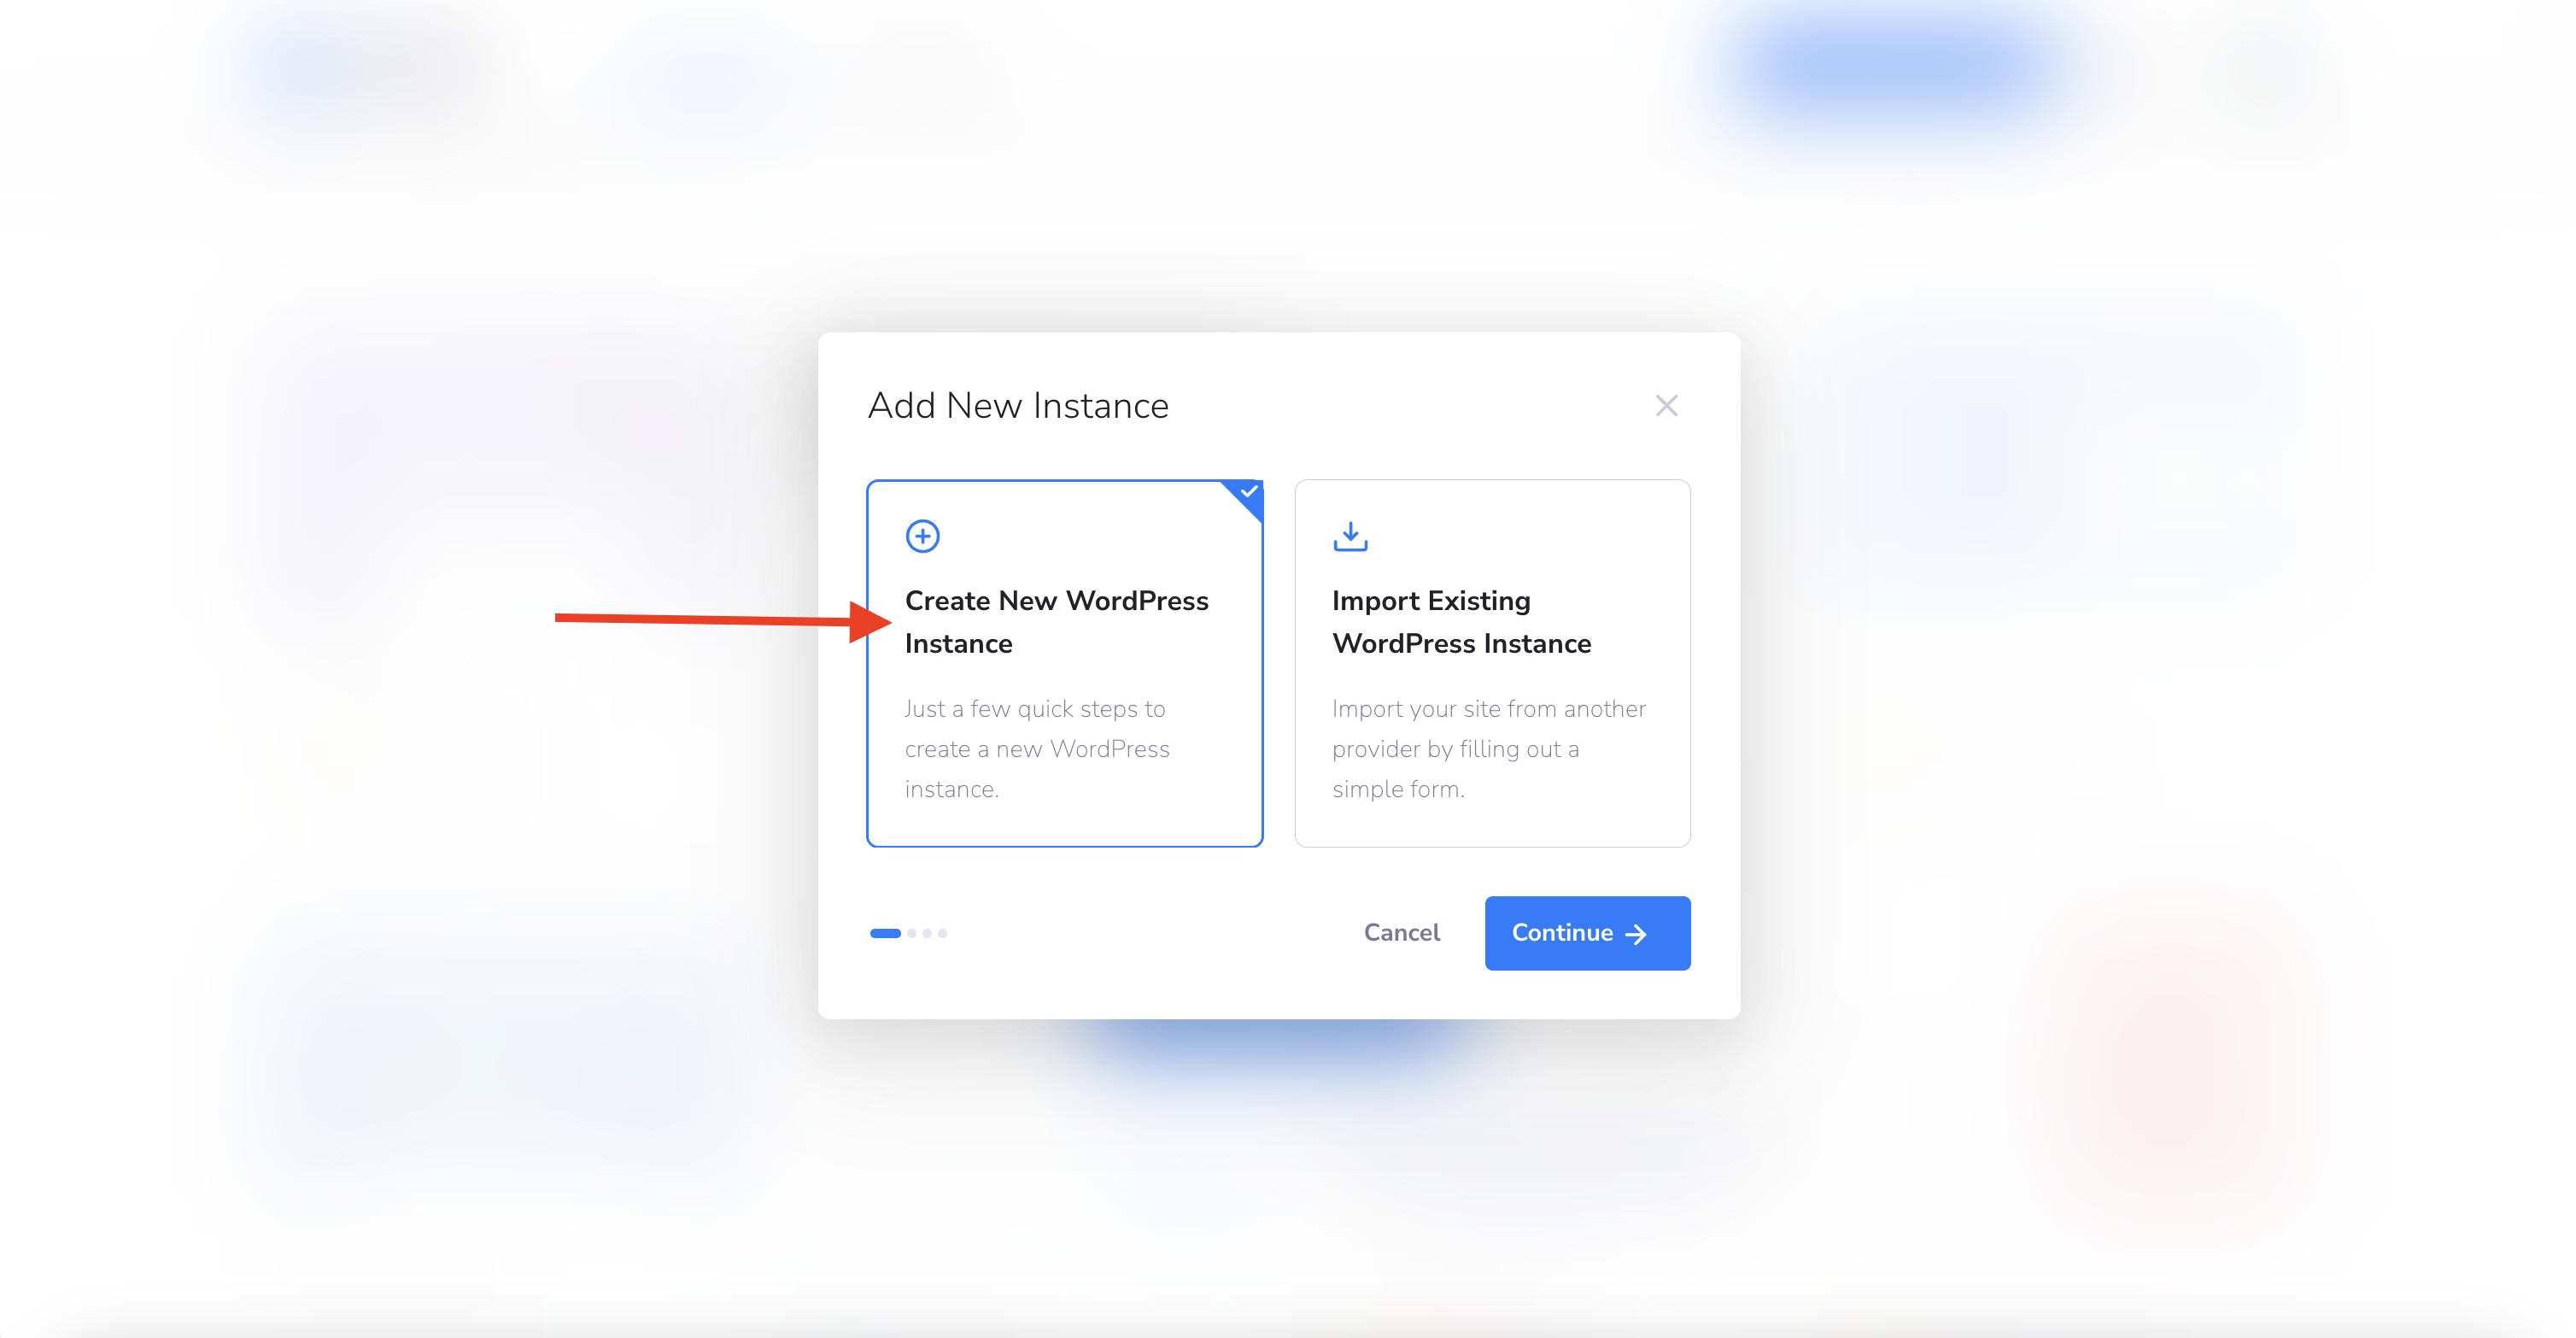
- Initiate Your First Instance: Click on Create First Instance to begin crafting your WordPress site.
- Create a New WordPress Instance: Follow the prompt to start a new instance.
Step 6: Customize Your Site
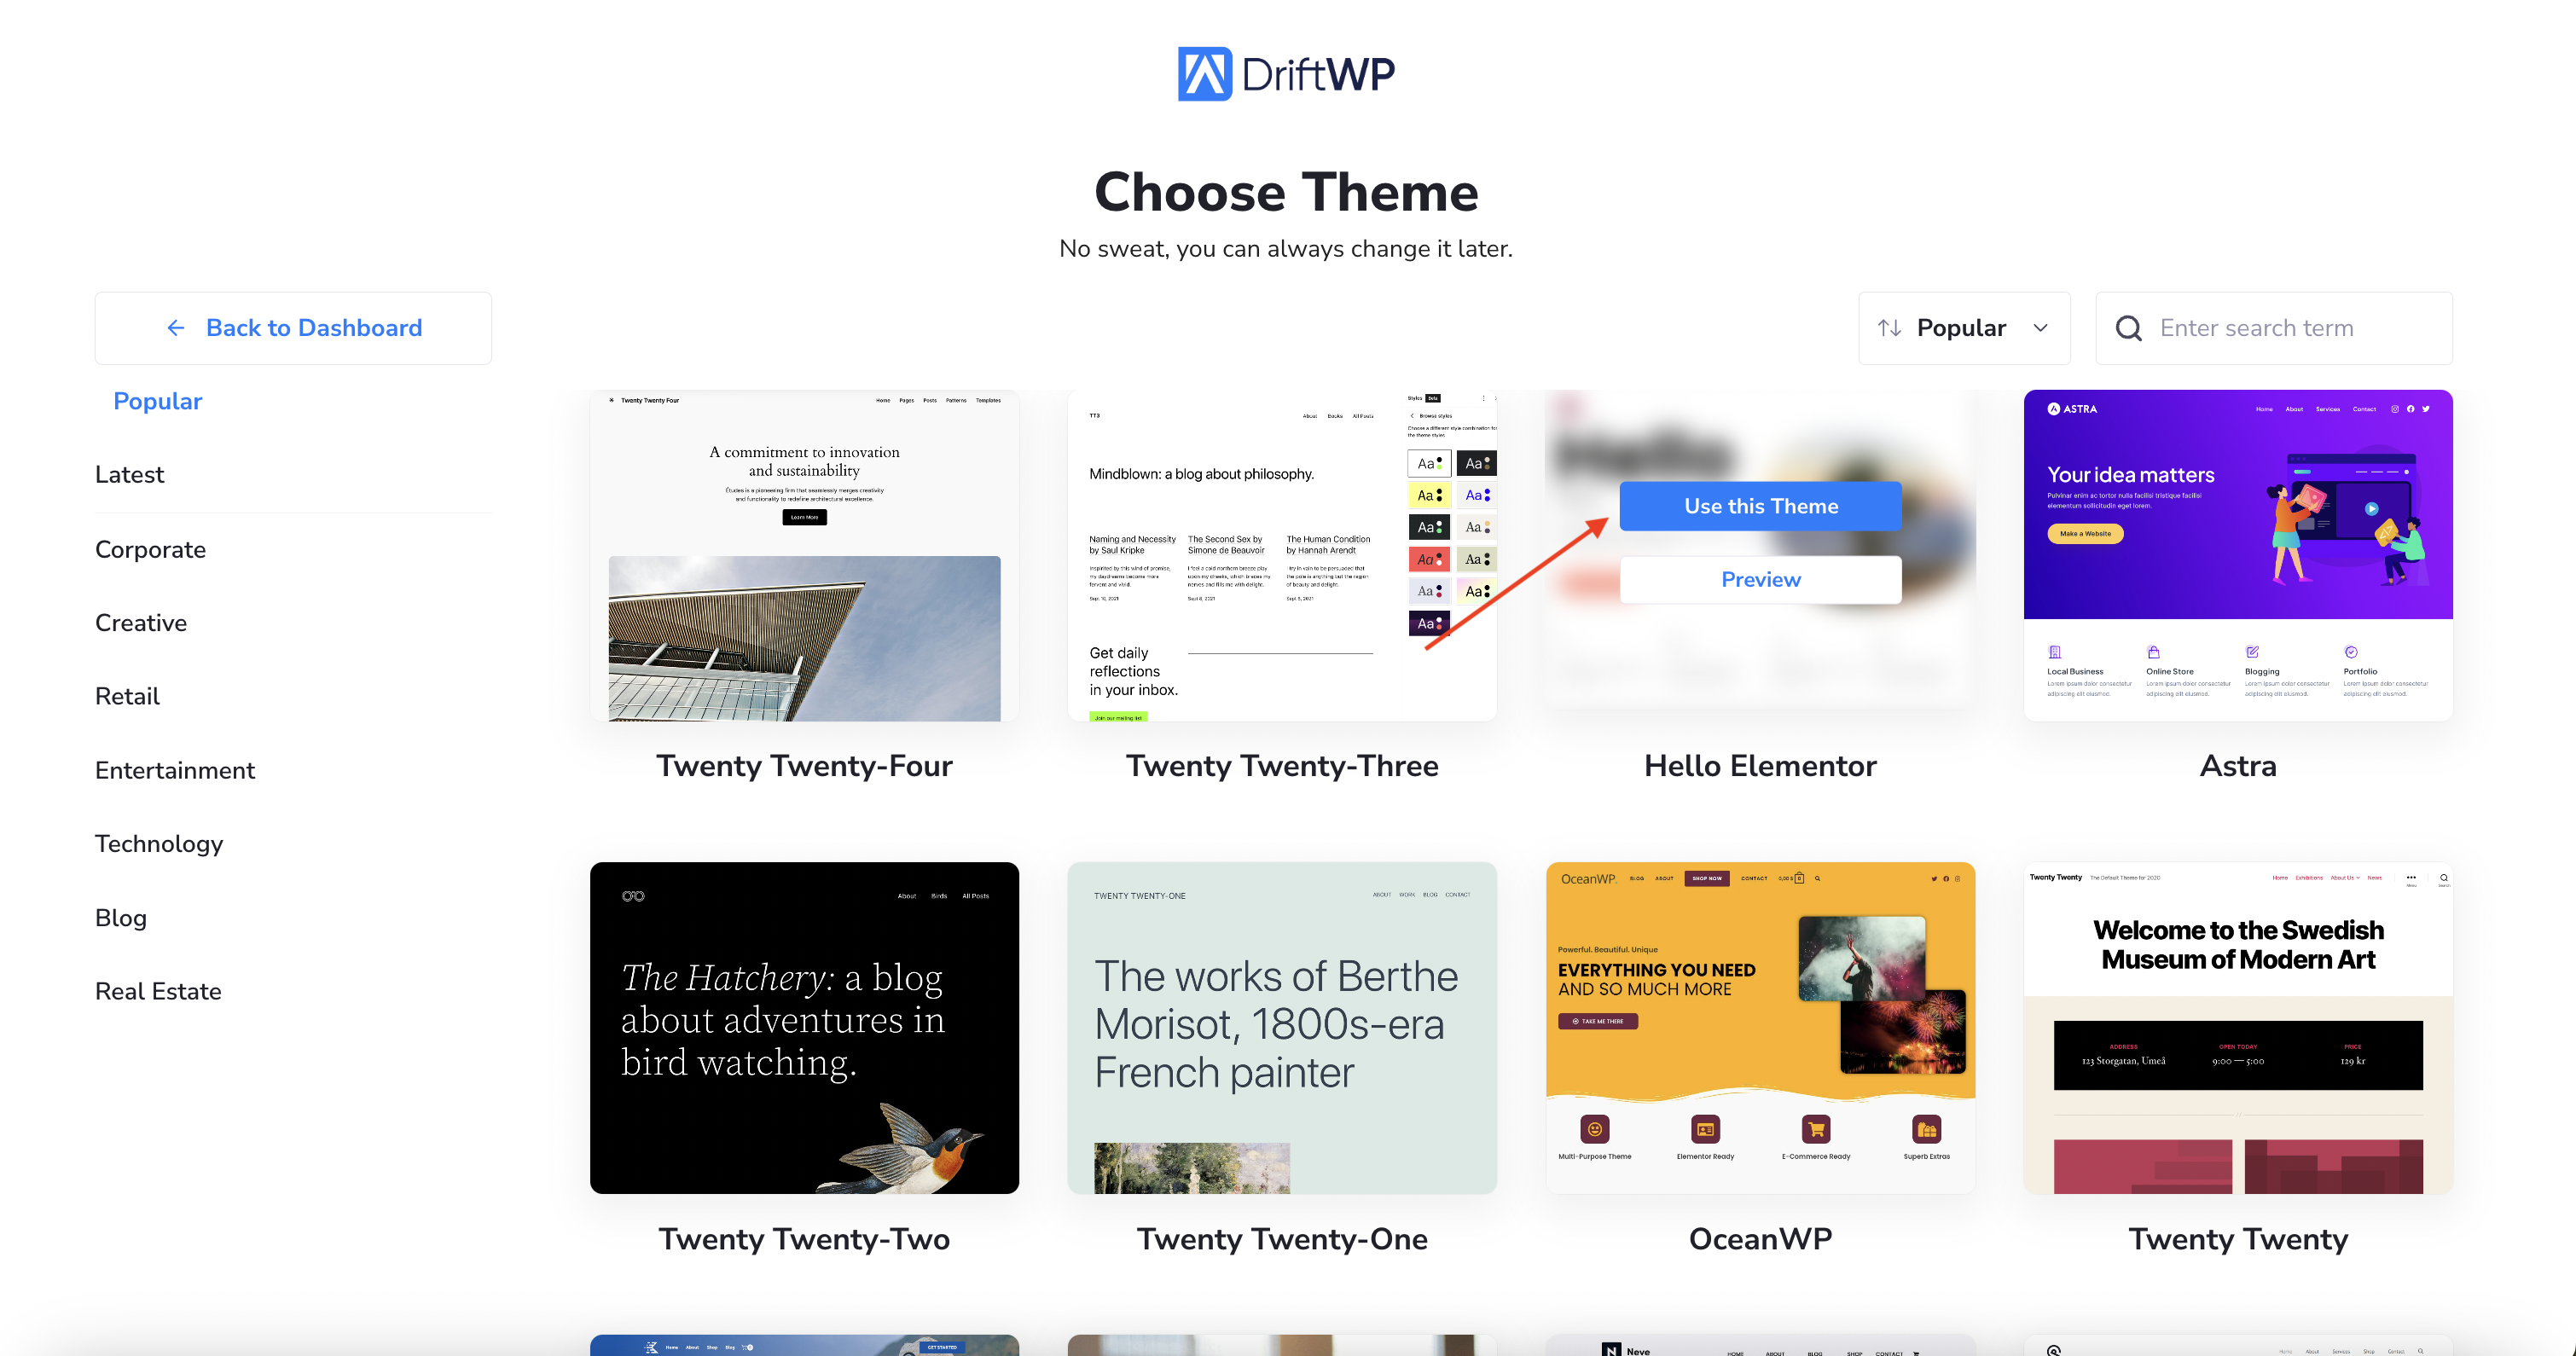
- Choose Your Theme: Select a theme that captures your vision. Feel free to use filters or the search function to narrow down your choices.
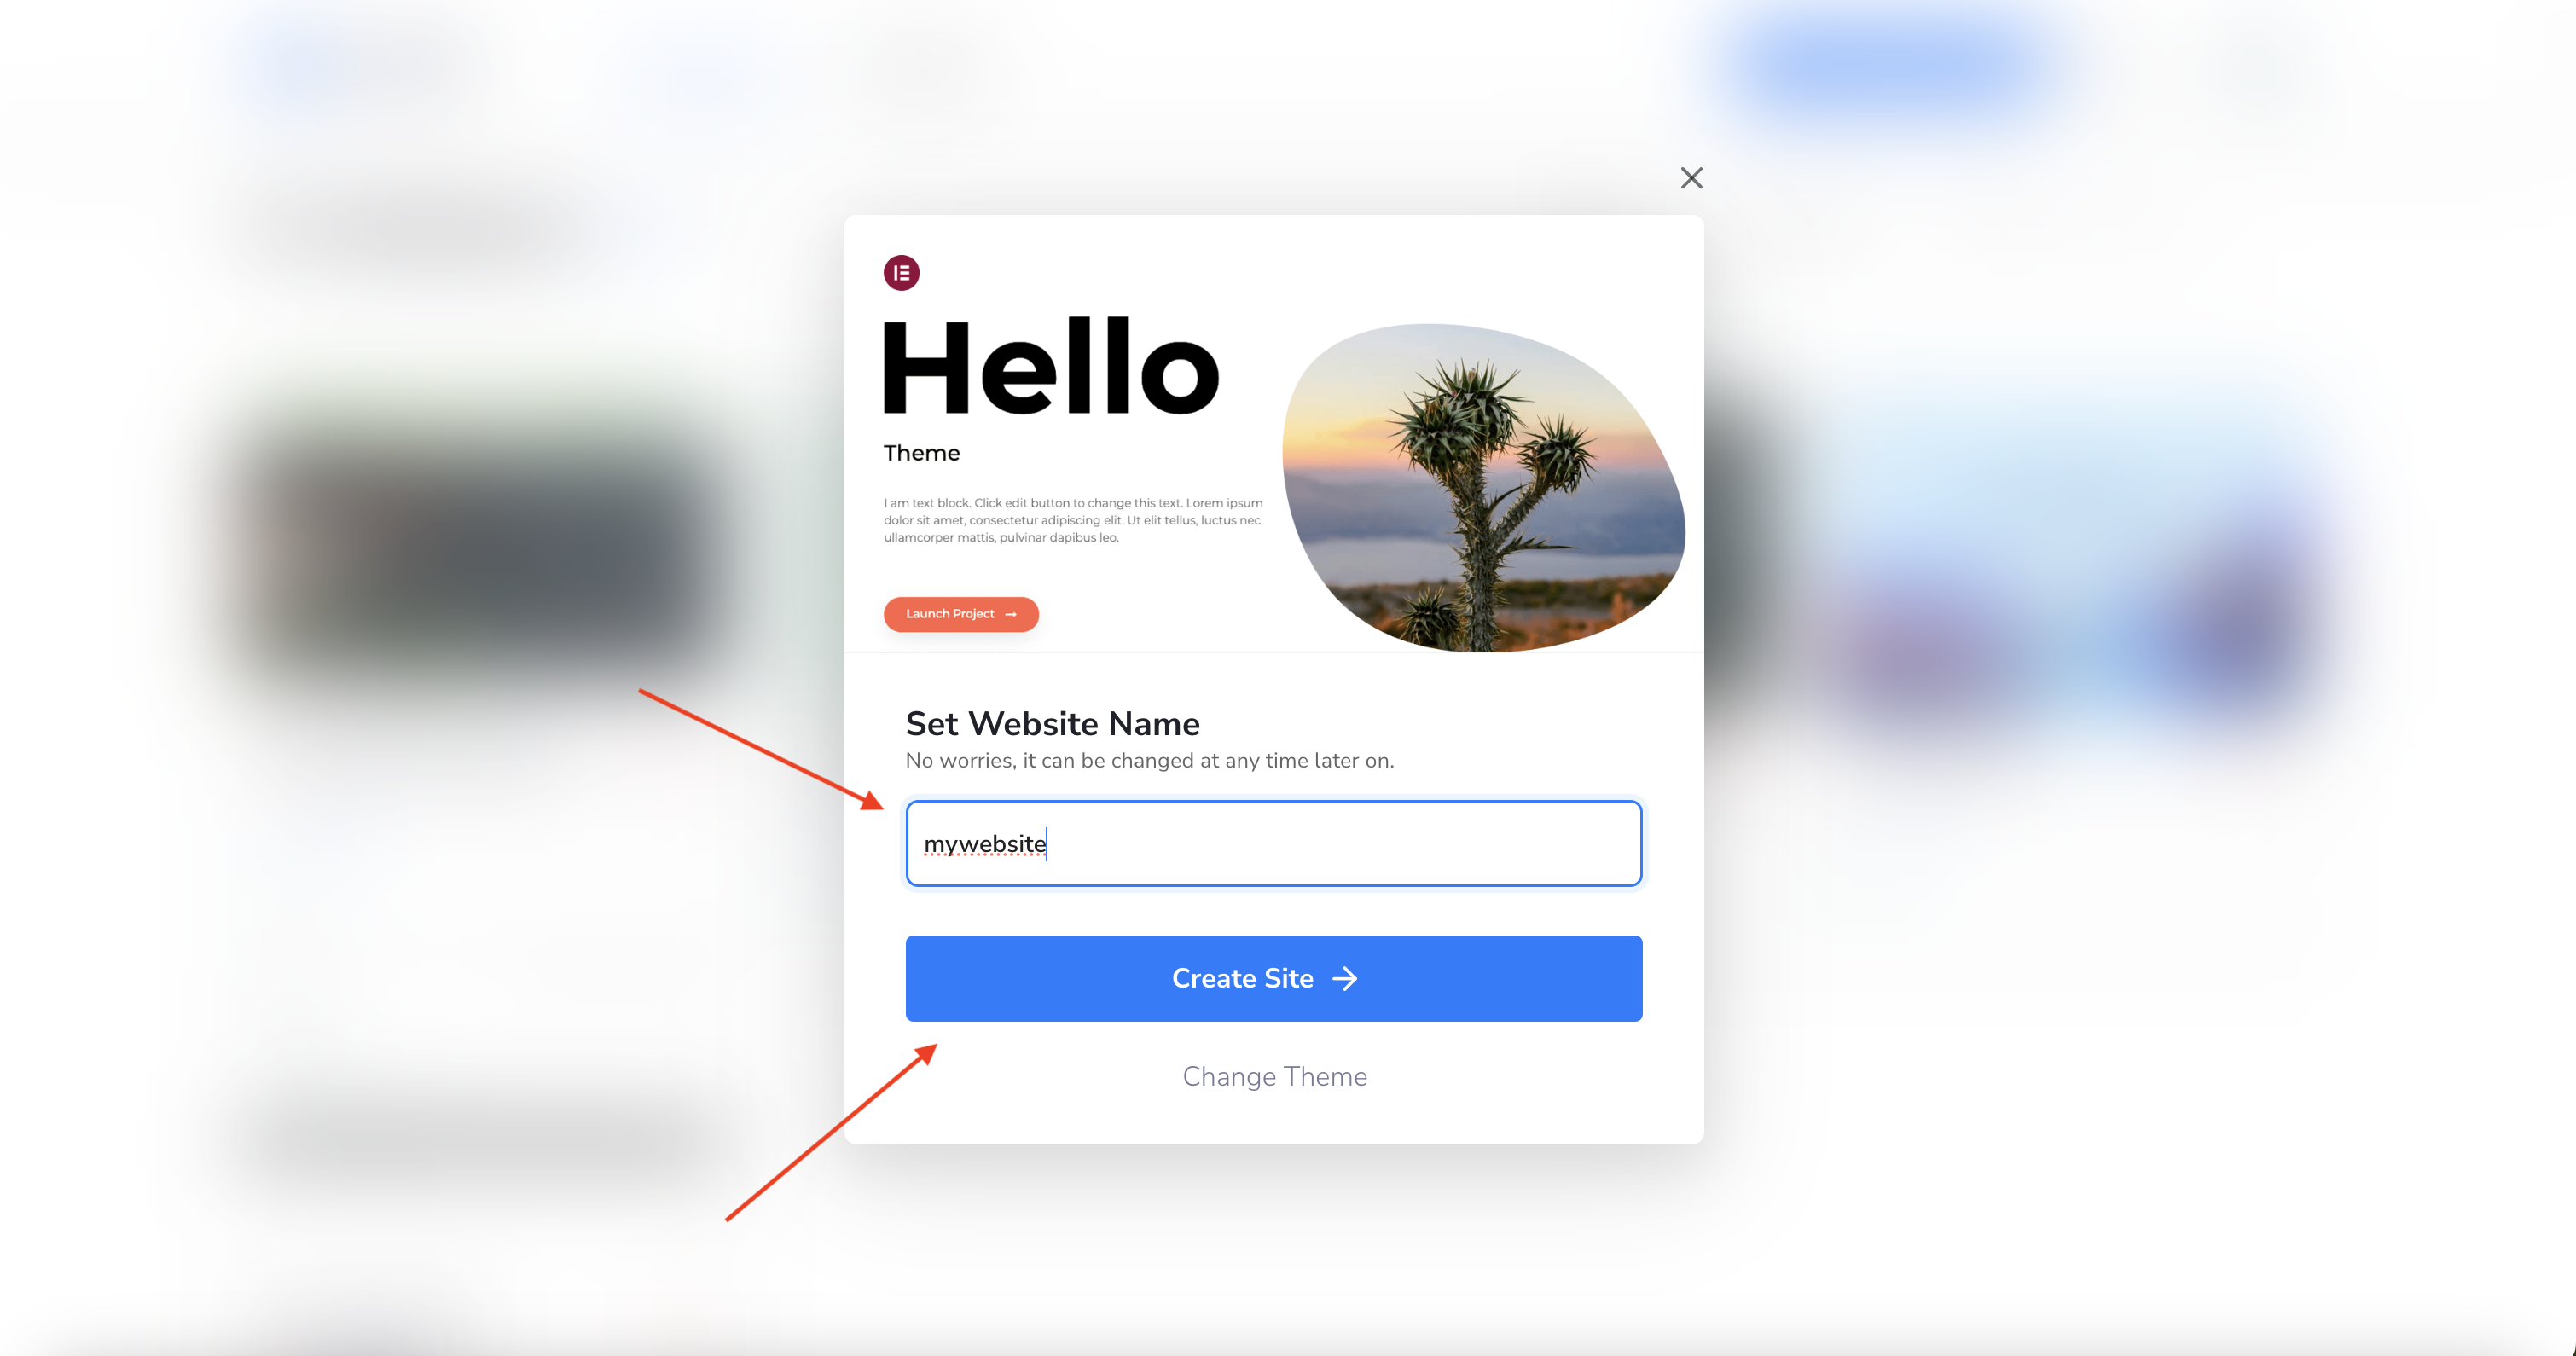
Name Your Site: Enter your site’s name. It’s not necessary to use the full website name; a project name or abbreviation works too.
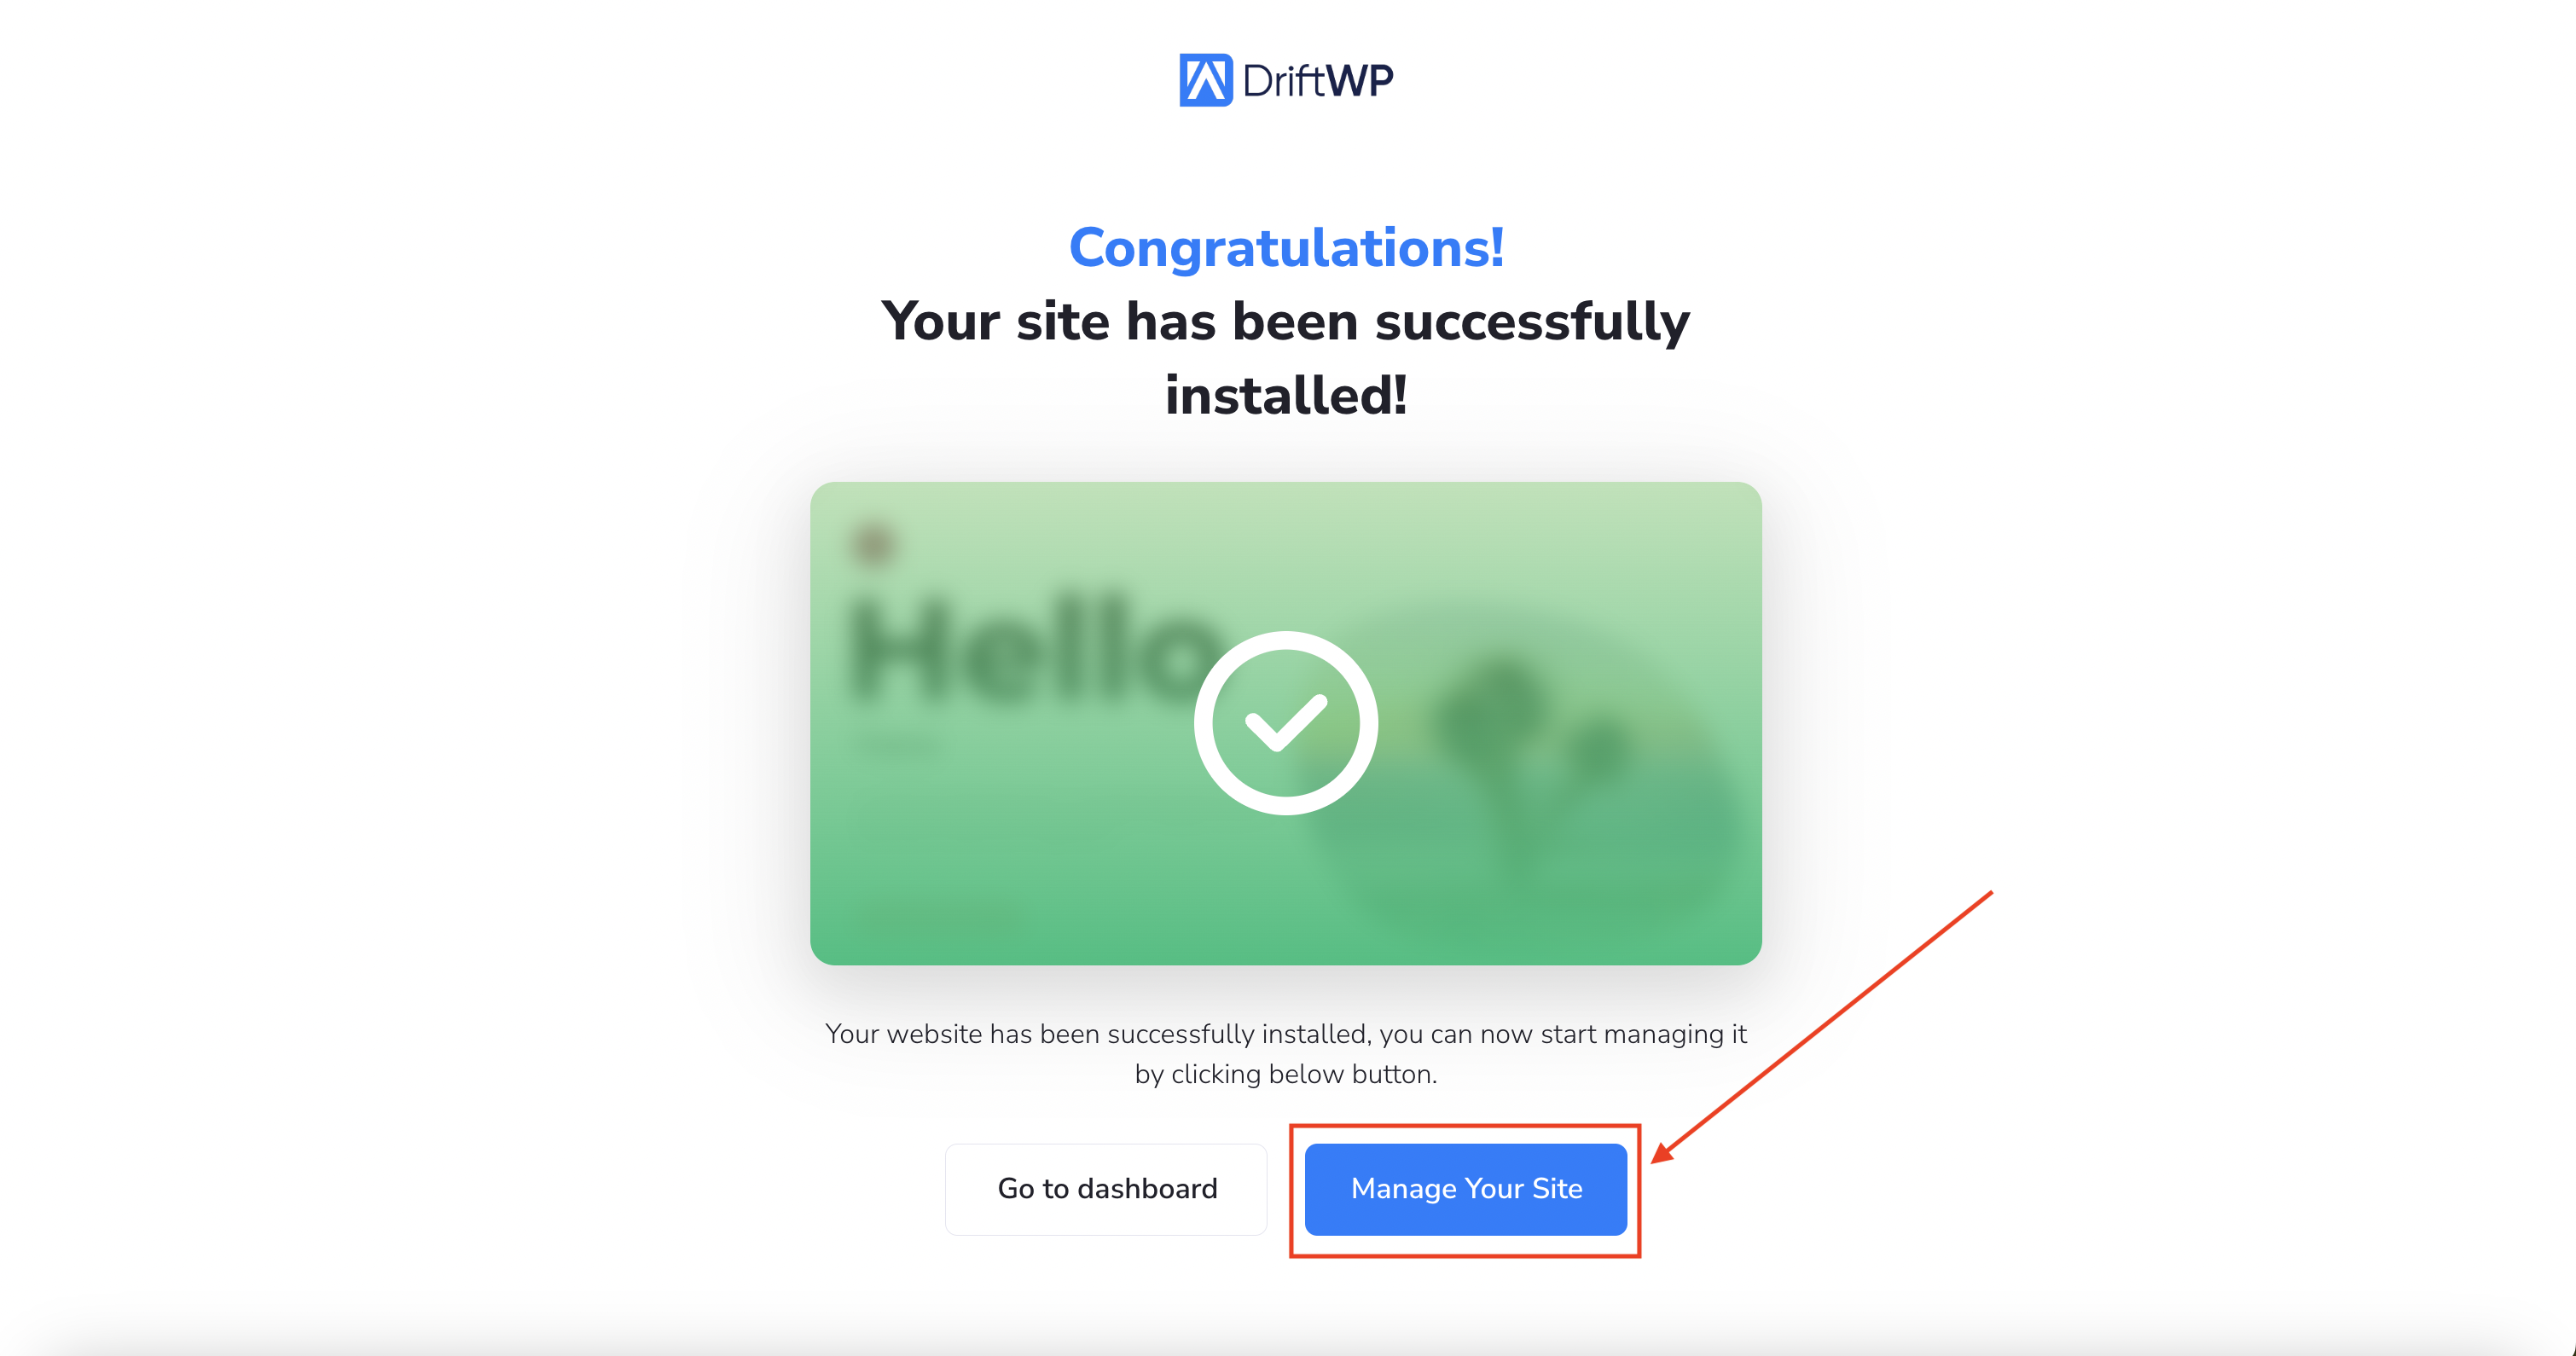
Step 7: Congratulations!
- Your Website Is Ready: Well done! Your website is now live. Manage and customize it anytime by clicking on Manage Your Site.
We're thrilled to have you on board and can't wait to see what you create. If you have any questions or need further assistance, our customer support team is always here to help.


